Douglas DC-3MSFS 2024 Startup Checklist · 180 steps
Douglas DC-3
MSFS 2024 - 0/180 STEPS
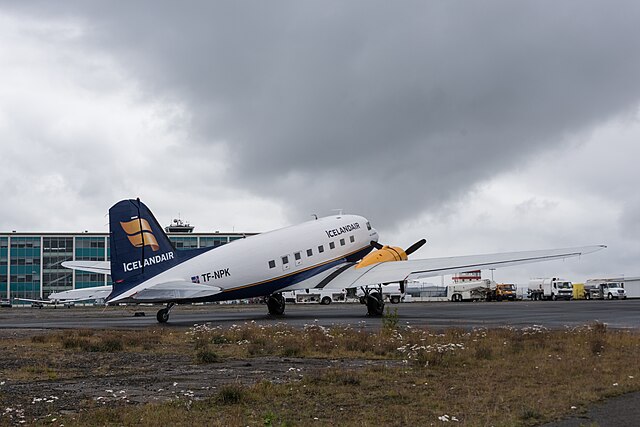
Wikimedia Commons / Aero IcarusCC BY-SA 2.0
Transport1930s
AIRCRAFT BRIEF
The Douglas DC-3 first flew on December 17, 1935 and revolutionized commercial aviation by becoming the first airliner that could turn a profit carrying passengers alone without relying on mail subsidies. By 1939, approximately 90% of all airline flights worldwide used the DC-3 or its derivatives. Nearly 90 years after its debut, the DC-3 and its military C-47 variant remain in active service with select operators around the world, a testament to its rugged reliability and timeless design.
RANGE VISUALIZER
SPECIFICATIONS
manufacturerDouglas Aircraft Company (now Boeing)
first Flight1935
roleShort to medium-range transport / Airliner
crew2 pilots + optional flight attendant
engines2x Pratt and Whitney R-1830-S1C3G Twin Wasp (1,200 hp each)
max Speed413 km/h (223 kts)
range2,540 km (1,370 nmi)
ceiling23,200 ft
weight11,431 kg (MTOW)
PHS 1 — Pre-Flight Planning7 steps
| 01 | Weather BriefingNOTE: Check departure, enroute, and destination weather. No radar or modern weather tools - rely on forecasts and PIREPs. Ceiling and visibility critical for this era aircraft. | REVIEWED | |
| 02 | NOTAMsNOTE: Check for runway closures, TFRs, and any airspace restrictions along route. | REVIEWED | |
| 03 | Fuel RequiredNOTE: DC-3 burns approx 80-90 GPH total at cruise. Include VFR reserves (45 min). Max fuel 822 US gallons across all tanks. | CALCULATED | |
| 04 | Weight and Balance / Cargo ManifestCAUTION: Max takeoff weight 25,200 lbs. Verify cargo and passenger load against CG limits. Tail-heavy loading is dangerous in tailwheel aircraft. | WITHIN LIMITS | |
| 05 | Takeoff and Landing DistancesNOTE: Account for density altitude, runway surface condition, and obstacle clearance. Single-engine performance must be considered for short fields. | CALCULATED | |
| 06 | VFR Charts / RouteNOTE: Plan waypoints, airways, and alternates. Mark frequencies and estimated positions. No GPS - dead reckoning and radio navigation. | REVIEWED | |
| 07 | Passenger BriefingNOTE: Brief seatbelts, exits, smoking rules, and sterile cockpit. Seat belt and no-smoking signs to be used during taxi, takeoff, and landing. | COMPLETE |
PHS 2 — Before Start24 steps
| 01 | Parking BrakeNOTE: Verify hydraulic brake pressure is adequate - minimum 500 PSI. Chock wheels if on a slope. | SET | |
| 02 | Control Locks / Gust LocksCAUTION: Release all gust locks including elevator control. Failure to remove elevator gust lock will result in loss of control on takeoff. | REMOVED | |
| 03 | Battery Switch | ON | |
| 04 | Generator Switches (Both) | ON | |
| 05 | Fuel GaugesNOTE: Verify main tanks have at least 200 gallons total (100 per side) for takeoff. Note auxiliary tank quantities. | CHECK - Adequate for flight | |
| 06 | Fuel Selectors (Both Engines)NOTE: Always start and take off on main tanks. | MAIN TANKS | |
| 07 | Firewall Fuel Shutoff Valves (Both) | OPEN | |
| 08 | Hydraulic PressureCAUTION: Hydraulic pressure required for brakes, landing gear, and flaps. Hand pump available as backup. | CHECK - 500 PSI minimum | |
| 09 | Landing Gear LeverNOTE: Confirm green indicator lights. | DOWN AND LOCKED | |
| 10 | FlapsNOTE: Verify hydraulically retracted. | UP | |
| 11 | Autopilot | OFF | |
| 12 | Seat Belt / No Smoking Signs | ON | |
| 13 | Cockpit Door | SECURED | |
| 14 | Nav Lights | ON | |
| 15 | Cowl Flaps (Both Engines)NOTE: Critical for radial engine cooling during start and warm-up. Full open for all ground ops. | FULL OPEN | |
| 16 | Propellers (Both)NOTE: Prop controls fully forward before start to ensure full pitch control. | FULL FORWARD - HIGH RPM | |
| 17 | Mixtures (Both)NOTE: Start with mixtures at idle cutoff. Advance to auto-rich as engine catches. | IDLE CUTOFF | |
| 18 | Throttles (Both)NOTE: Slightly open throttles to allow air flow for starting. | CRACKED 1/2 INCH | |
| 19 | Carburetor Heat (Both)NOTE: Cold for starting. Carburetor heat reduces engine power and can cause rich mixture. | COLD (OFF) | |
| 20 | Fuel Boost Pumps (Both)NOTE: Energize boost pumps and verify fuel pressure before starting. Essential for priming the fuel system. | ON - 14 PSI | |
| 21 | Magneto Switches (Both)NOTE: Magnetos off until ready to start each engine. | OFF | |
| 22 | Propeller AreaCAUTION: Call CLEAR PROP and wait for verbal response from ground crew before attempting engine start. | CLEAR | |
| 23 | GSX - Fuel TruckNOTE: GSX menu: Refuel Aircraft. Set desired fuel load before confirming. | REFUEL COMPLETE | |
| 24 | GSX - Passenger BoardingNOTE: GSX menu: Board Passengers via airstairs. Wait for all passengers. | COMPLETE |
PHS 3 — Engine Start - Right Engine First9 steps
| 01 | Right Engine PrimerNOTE: Prime at one-second intervals. Over-priming causes hydraulic lock or fire risk. Skip if engine was recently run. | 3-5 PUMPS (cold engine) | |
| 02 | Right Engine Magneto Master Button | IN (ACTIVE) | |
| 03 | Right Magnetos | BOTH ON | |
| 04 | Right Engine StarterCAUTION: Hydraulic lock from oil in lower cylinders can destroy the engine. Always pull prop through by hand if engine has not been run for several days.NOTE: Let the starter turn the engine through at least 12 propeller blades before energizing magnetos. This clears oil from lower cylinders and prevents hydraulic lock. | ENGAGE - Count 12 blades | |
| 05 | Right Engine Ignition BoosterNOTE: Hold ignition booster while cranking to deliver shower of sparks to forward spark plugs. | ON (hold) | |
| 06 | Right Mixture (as engine fires)NOTE: Advance mixture smoothly to auto-rich as engine catches. If engine does not catch within 10 seconds release starter and wait 30 seconds before retry. | ADVANCE TO AUTO RICH | |
| 07 | Right Engine Oil PressureWARNING: If oil pressure does not indicate within 30 seconds of start, shut down immediately. Continuing without oil pressure will destroy the engine. | INDICATE WITHIN 30 SECONDS | |
| 08 | Right Engine RPMNOTE: Keep RPM below 800 until oil pressure is stabilized. Allow 30 seconds minimum at low idle before advancing. | BELOW 800 RPM (warm-up) | |
| 09 | Right Engine InstrumentsNOTE: Verify oil pressure in normal range (60-90 PSI at idle). Oil temperature will be low initially. | CHECK - Oil pressure, oil temp |
PHS 4 — Engine Start - Left Engine8 steps
| 01 | Left Engine PrimerNOTE: Same technique as right engine. Prime at one-second intervals. | 3-5 PUMPS (cold engine) | |
| 02 | Left Engine Magneto Master Button | IN (ACTIVE) | |
| 03 | Left Magnetos | BOTH ON | |
| 04 | Left Engine StarterNOTE: Crank through 12 blades before magnetos and ignition booster. | ENGAGE - Count 12 blades | |
| 05 | Left Engine Ignition Booster | ON (hold) | |
| 06 | Left Mixture (as engine fires) | ADVANCE TO AUTO RICH | |
| 07 | Left Engine Oil PressureWARNING: If oil pressure does not indicate within 30 seconds, shut down immediately. | INDICATE WITHIN 30 SECONDS | |
| 08 | Left Engine RPM | BELOW 800 RPM (warm-up) |
PHS 5 — After Start / Engine Warm-Up11 steps
| 01 | Fuel Boost Pumps (Both)NOTE: After both engines are running, turn off boost pumps and confirm low-pressure warning lights extinguish. Engine-driven fuel pumps should maintain adequate pressure. | OFF - Verify fuel pressure normal | |
| 02 | Both Engine RPMNOTE: Advance both engines to 1,000 RPM for warm-up. Warm radial engines slowly - do not rush the warm-up. | 1,000 RPM (warm-up) | |
| 03 | Oil Temperature (Both)NOTE: Do not advance power until oil temperature reaches at least 40 degrees C. Cold oil cannot lubricate the engine properly. | RISING - Minimum 40 degrees C before run-up | |
| 04 | Oil Pressure (Both)NOTE: Normal operating range. Pressure will drop slightly as oil warms. | 60-90 PSI | |
| 05 | Cylinder Head Temperature (Both)NOTE: CHT should rise steadily during warm-up. Maximum 260 degrees C. Cowl flaps full open assists cooling. | RISING - Monitor for overtemp | |
| 06 | Vacuum Gauges (Both)NOTE: Vacuum pumps power flight instruments. Verify adequate suction on both engines. | CHECK - Above 2 inches Hg | |
| 07 | Electrical SystemNOTE: Verify both generators are on-line and charging. Check ammeter and bus voltage. | CHECK - Generators charging | |
| 08 | RadiosNOTE: Set COM1 to ATIS or ground frequency. Set transponder code. | ON AND SET | |
| 09 | Flight InstrumentsNOTE: Set altimeters to local QNH. Align directional gyro to magnetic compass. Set VSI to zero. | CHECK AND SET | |
| 10 | Propeller Cycling (Both)NOTE: Advance prop control to high RPM, then back to cruise setting and return to full forward. This circulates warm oil into the propeller governor. | CYCLE ONCE (when oil temp above 40 C) | |
| 11 | Clock | SET |
PHS 6 — Run-Up / Power Check13 steps
| 01 | Parking Brake | SET - Check pressure | |
| 02 | Throttle Both EnginesNOTE: Advance both throttles to achieve 2,350 RPM at approximately 30 inches manifold pressure for magneto and prop checks. | ADVANCE TO RUN-UP RPM 2,350 | |
| 03 | Manifold Pressure | 30 INCHES AT 2,350 RPM | |
| 04 | Right Engine Mag CheckCAUTION: A mag check is done at field barometric pressure - approximately 30 inches at sea level. Perform checks at 2,350 RPM plus or minus 50 RPM.NOTE: Switch from BOTH to RIGHT mag, note RPM drop, return to BOTH. Then LEFT mag. Maximum 65 RPM drop on either mag. If drop exceeds 65 RPM, do not depart. | MAX 65 RPM DROP PER MAG | |
| 05 | Left Engine Mag Check | MAX 65 RPM DROP PER MAG | |
| 06 | Right Propeller Governor CheckNOTE: Pull prop control aft to reduce pitch, observe RPM drop of 200-300 RPM, advance control back to full forward and verify RPM returns. Cycle only after oil temp exceeds 40 C. | RPM DROPS THEN RECOVERS | |
| 07 | Left Propeller Governor Check | RPM DROPS THEN RECOVERS | |
| 08 | Right Engine Carburetor HeatNOTE: Application of carb heat should cause a slight RPM drop (enrichment effect), then may rise slightly. Return to cold. Use carb heat before reducing power in flight. | ON - Check RPM drop, then OFF | |
| 09 | Left Engine Carburetor Heat | ON - Check RPM drop, then OFF | |
| 10 | Both Mixtures | AUTO RICH | |
| 11 | Oil Temperature / Pressure (Both)NOTE: Oil temp should be 40-80 degrees C by now. Pressure 60-90 PSI at run-up RPM. | IN GREEN | |
| 12 | Cylinder Head Temperature (Both) | CHECK - Not exceeding 260 C | |
| 13 | Both Throttles | REDUCE TO IDLE |
PHS 7 — Taxi8 steps
| 01 | Crew and Passengers | ABOARD AND SEATED | |
| 02 | Cabin DoorNOTE: Verify cabin door closed and door warning light (if equipped) extinguished. | SECURED - Light OFF | |
| 03 | Parking Brake | RELEASE | |
| 04 | ThrottlesNOTE: Taxi power only. The DC-3 is a tailwheel aircraft - differential braking and engine power for steering. Use brake pedals carefully to avoid locking wheels. | ADVANCE SLIGHTLY - 1,000-1,200 RPM | |
| 05 | Differential Braking / Engine PowerNOTE: The tailwheel is steerable but limited range. Use differential throttle and braking for tight turns. Tailwheel aircraft visibility forward is limited - S-turns may be needed on narrow taxiways. | USE FOR STEERING | |
| 06 | Flight ControlsNOTE: As you taxi, verify aileron, elevator, and rudder move freely and in the correct direction. | CHECK FULL AND FREE | |
| 07 | BrakesNOTE: Tap brakes to verify function before reaching runway. Hydraulic brake system. | CHECK - Apply briefly at taxi speed | |
| 08 | Directional GyroNOTE: Verify heading indicator tracks correctly during turns. | CHECK AGREES WITH COMPASS |
PHS 8 — Before Takeoff16 steps
| 01 | Parking Brake | SET | |
| 02 | Fuel Selectors (Both) | MAIN TANKS - VERIFY | |
| 03 | Fuel Boost Pumps (Both)NOTE: On for takeoff as backup in case engine-driven pump fails at critical moment. | ON | |
| 04 | Mixtures (Both)NOTE: Full rich for takeoff. Lean mixture at high-altitude airports only on pilot direction. | AUTO RICH | |
| 05 | Propellers (Both)NOTE: Prop controls full forward to achieve maximum RPM (2,700) for takeoff. | FULL FORWARD - HIGH RPM | |
| 06 | Cowl Flaps (Both)NOTE: Maximum cooling airflow required for takeoff power. Radial engines are susceptible to overboosting and overtemperature. | FULL OPEN | |
| 07 | Carburetor Heat (Both)NOTE: Carb heat reduces power. Use cold air for takeoff. | COLD (OFF) | |
| 08 | FlapsNOTE: DC-3 typically takes off with flaps up unless field length requires partial flap. Flaps are hydraulic split-type. | UP (0 degrees) - Normal takeoff | |
| 09 | Elevator TrimNOTE: Set elevator trim slightly aft of neutral to assist rotation at approximately 108 MPH. | SET FOR TAKEOFF | |
| 10 | Rudder TrimNOTE: Pre-set slight right rudder trim to counter left-turning tendency on takeoff (torque, P-factor, gyroscopic precession). | SET RIGHT RUDDER TRIM | |
| 11 | Hydraulic Pressure | 500 PSI MINIMUM | |
| 12 | Flight InstrumentsNOTE: Altimeters set, DI aligned to compass, VSI at zero. | CHECK AND SET | |
| 13 | Transponder | ALT (Mode C) | |
| 14 | Runway / HeadingNOTE: Confirm assigned runway heading against compass and DI. | CONFIRM | |
| 15 | ATIS / AWOS | RECEIVED - QNH SET | |
| 16 | Takeoff Clearance | RECEIVED |
PHS 9 — Takeoff7 steps
| 01 | Both ThrottlesCAUTION: Full takeoff power is 1,200 HP per engine at 47 in. / 2,700 RPM. Maximum time at full takeoff power is 1 minute. Monitor engine instruments continuously during takeoff roll.NOTE: Advance both throttles together smoothly to achieve 47 inches manifold pressure at 2,700 RPM (full takeoff power / METO). Abrupt throttle application can cause torque-induced swerve. | ADVANCE SMOOTHLY TO TAKEOFF POWER | |
| 02 | Directional Control (Rudder)NOTE: Apply right rudder to counter left-turning tendency during takeoff roll. The tailwheel configuration requires active rudder inputs. Use differential braking if needed at low speed. | MAINTAIN RUNWAY CENTERLINE | |
| 03 | Tailwheel (Lift Off)NOTE: Apply gentle back pressure to raise tailwheel off the ground at 60-70 MPH to achieve a 3-point level attitude for improved visibility and lift-off performance. | RAISE AT 60-70 MPH | |
| 04 | Engine InstrumentsWARNING: If any engine instrument exceeds limits during takeoff roll, abort if runway remains. Radial engines can fail quickly if overtempered or run with low oil pressure. | MONITOR - MP, RPM, CHT, Oil | |
| 05 | Rotation / Lift-OffNOTE: Aircraft lifts off at approximately 108 MPH (94 KIAS) in standard conditions. Allow aircraft to fly off naturally - do not force rotation. | 108 MPH (94 KIAS) | |
| 06 | Initial Climb Attitude | ESTABLISH POSITIVE RATE | |
| 07 | Landing GearCAUTION: Do not raise gear until positive rate of climb is established and runway cannot be used for abort. Single-engine climb performance is limited - keep gear down if in doubt.NOTE: Gear retraction is hydraulic. Confirm positive rate and runway behind before raising gear. Single-engine climb gear-up is marginal. | RETRACT AFTER POSITIVE RATE CONFIRMED |
PHS 10 — Climb13 steps
| 01 | Takeoff PowerNOTE: Reduce from full takeoff power to METO climb power as soon as safely airborne. Day - 300 ft minimum. Night - 500 ft minimum. | REDUCE AFTER 1 MINUTE / 300 FT | |
| 02 | Climb Power - Manifold PressureNOTE: After gear up, reduce manifold pressure from 47 inches to 35 inches. | REDUCE TO 35 INCHES | |
| 03 | Climb Power - RPM | 2,450 RPM | |
| 04 | AirspeedNOTE: After power reduction, accelerate to normal climb speed of 120-130 MPH. | ACCELERATE TO 120 MPH (104 KIAS) | |
| 05 | Manifold Pressure (further reduce) | 30-32 INCHES AT ALTITUDE | |
| 06 | Climb RPMNOTE: Established climb at 2,050 RPM, 30-32 inches MP, 120-130 MPH for normal climb. | 2,050 RPM | |
| 07 | Cowl Flaps (Both)NOTE: Once airborne and climbing, reduce cowl flap opening slightly to reduce drag while maintaining adequate cooling. Monitor CHT. | TRAIL (PARTLY CLOSED) | |
| 08 | Fuel Boost PumpsNOTE: Turn off boost pumps once established in climb and fuel pressure confirmed normal from engine-driven pumps. | OFF (verify fuel pressure normal) | |
| 09 | Cylinder Head Temperature (Both)NOTE: CHT is the primary engine health indicator. Open cowl flaps further if CHT approaches limits. | MONITOR - Do not exceed 260 C | |
| 10 | Oil Temperature (Both) | 60-80 C | |
| 11 | Oil Pressure (Both) | 60-90 PSI | |
| 12 | Altimeters | SET - Transition altitude check | |
| 13 | Navigation / RadioNOTE: DC-3 navigation is by VOR, ADF (NDB), and dead reckoning. No GPS. Tune first enroute navaid. | CONFIRM TRACK - Tune VOR or ADF as required |
PHS 11 — Cruise12 steps
| 01 | Cruise Power - Manifold PressureNOTE: Normal cruise is approximately 650 HP per engine - 31.7 inches MP, 2,050 RPM. | 28-32 INCHES | |
| 02 | Cruise RPM | 2,050 RPM | |
| 03 | Mixtures (Both)NOTE: At altitude above approximately 5,000 ft, lean mixtures from auto-rich toward auto-lean to maintain proper fuel-air ratio and reduce fuel consumption. | AUTO LEAN (as altitude increases) | |
| 04 | Cowl Flaps (Both)NOTE: Adjust cowl flaps to maintain CHT within normal range. Partially or fully closed in cruise reduces drag. Reopen if CHT rises. | CLOSE AS REQUIRED | |
| 05 | Fuel Tank SelectionNOTE: Monitor fuel gauges. When main tanks reach 175 gallons each, switch to auxiliary tanks. Keep main tanks reserved for approach and landing. | MAIN TANKS (monitor levels) | |
| 06 | Fuel Boost Pumps | OFF (normal cruise) | |
| 07 | Oil Temperature (Both)NOTE: Monitor throughout cruise. Increase cowl flaps if oil temp rises above 80 C. | 60-80 C | |
| 08 | Oil Pressure (Both) | 60-90 PSI | |
| 09 | Cylinder Head Temperature (Both) | WITHIN LIMITS - Below 260 C | |
| 10 | Vacuum (Both) | ADEQUATE - Above 3 inches Hg | |
| 11 | Navigation CheckNOTE: Periodic position checks using VOR, ADF, and landmarks. Update dead reckoning log. | ON TRACK - Log position | |
| 12 | RadioNOTE: On airways, provide position reports to Center or FSS if required. Monitor ATIS at destination when in range. | COMMUNICATE - Position reports as required |
PHS 12 — Descent10 steps
| 01 | ATIS / Weather | OBTAINED - QNH noted | |
| 02 | Destination Altimeter | SET | |
| 03 | Fuel Selectors (Both)NOTE: Switch back to main tanks for descent and approach. Ensure adequate fuel in mains for approach, missed approach, and alternate. | MAIN TANKS | |
| 04 | Fuel Boost Pumps (Both)NOTE: On for descent, approach, and landing. | ON | |
| 05 | Descent PowerNOTE: Reduce power gradually for descent. Avoid prolonged idle power on radial engines - they can cool too rapidly causing cylinder shock cooling. Maintain at least 15-20 inches MP during descent. | REDUCE MP GRADUALLY | |
| 06 | Carburetor Heat (Both)NOTE: Apply carb heat before any significant power reduction to prevent carburetor icing. Check for RPM rise indicating ice was present. | AS REQUIRED | |
| 07 | Cowl Flaps (Both)NOTE: Partially open cowl flaps during power reduction to prevent shock cooling. Full power changes require full open. | OPEN SLIGHTLY (descent cooling) | |
| 08 | Mixtures (Both)NOTE: Enrich mixtures as you descend below 5,000 ft to auto-rich. | AUTO RICH (below 5,000 ft) | |
| 09 | Oil Temperature (Both) | MONITOR - Add power if cooling too rapidly | |
| 10 | Approach BriefingNOTE: Brief runway in use, approach procedure, decision altitude / MDA, missed approach procedure, and go-around power setting. | COMPLETE |
PHS 13 — Before Landing11 steps
| 01 | Fuel Selectors (Both) | MAIN TANKS | |
| 02 | Fuel Boost Pumps (Both) | ON | |
| 03 | Mixtures (Both) | AUTO RICH | |
| 04 | Propellers (Both)NOTE: Advance prop controls to full forward (high RPM) before landing. Ensures maximum power available for go-around immediately. | FULL FORWARD - HIGH RPM | |
| 05 | Carburetor Heat (Both)NOTE: Apply carb heat on approach if icing conditions exist. Turn off before full power application for go-around. | AS REQUIRED | |
| 06 | Landing GearCAUTION: If any green light fails to illuminate, verify gear visually if possible or declare emergency. Do not land without confirmed gear down.NOTE: Extend landing gear. Verify three green indicator lights. DC-3 is a tailwheel aircraft - main gear and tailwheel all three must show down and locked. | DOWN AND LOCKED - Three greens | |
| 07 | Hydraulic PressureNOTE: Verify adequate hydraulic pressure for brakes. Hand pump backup available if pressure is low. | 500 PSI MINIMUM | |
| 08 | FlapsNOTE: Apply partial flaps (1/4) on downwind or base leg. Apply additional flaps (1/2 or 3/4) when field is made. DC-3 hydraulic split-flap system. | AS REQUIRED - 1/4 TO 1/2 ON APPROACH | |
| 09 | Cowl Flaps (Both)NOTE: Open cowl flaps for go-around readiness. Balance cooling need against drag. | OPEN AS REQUIRED | |
| 10 | Seat Belt Signs | ON | |
| 11 | Approach Speed (Final)NOTE: Normal approach speed with partial flaps. Cross the threshold at 85-90 MPH (74-78 KIAS). Single-engine final approach is flown at 110 MPH minimum. | 110-120 MPH (96-104 KIAS) |
PHS 14 — Landing6 steps
| 01 | Final Approach SpeedNOTE: Maintain approach speed on final. Adjust power to control descent rate. Aim point is stable threshold crossing. | 110-120 MPH (96-104 KIAS) | |
| 02 | Threshold Crossing SpeedNOTE: Cross runway threshold at 85-90 MPH with a stabilized approach. Reduce power to idle at threshold. | 85-90 MPH (74-78 KIAS) | |
| 03 | Flare and TouchdownCAUTION: The DC-3 tailwheel design makes it susceptible to ground looping if directional control is lost after touchdown. Maintain firm rudder control throughout the rollout.NOTE: Flare to a tail-low attitude for touchdown. Three-point landing (mains and tailwheel simultaneously) or slightly tail-low main gear first. Avoid wheelbarrowing (nose-low on mains only). | TAIL-LOW ATTITUDE | |
| 04 | Directional Control (Rollout)NOTE: Active rudder inputs required throughout rollout. Use differential braking only to supplement rudder - avoid excessive braking. | MAINTAIN CENTERLINE WITH RUDDER | |
| 05 | Throttles | IDLE (at touchdown) | |
| 06 | BrakingNOTE: Apply brakes firmly but progressively. The tailwheel provides directional stability only when weight is on it. Avoid hard braking while tail is still in the air. | SMOOTH AND PROGRESSIVE |
PHS 15 — After Landing8 steps
| 01 | FlapsNOTE: Retract flaps after clearing the runway to full up position. | RETRACT (HYDRAULIC UP) | |
| 02 | Carburetor Heat (Both) | COLD (OFF) | |
| 03 | Fuel Boost Pumps | OFF (when clear of runway and at low power) | |
| 04 | Cowl FlapsNOTE: Reopen cowl flaps after landing to prevent heat soak on hot radial engines during taxi. | FULL OPEN (for taxi and cooling) | |
| 05 | Transponder | STANDBY or ALT (per ATC) | |
| 06 | Landing and Taxi Lights | AS REQUIRED | |
| 07 | Hydraulic PressureNOTE: Verify adequate pressure available for taxi and parking brake. | CHECK | |
| 08 | Clear Runway Report | REPORT TO TOWER / GROUND |
PHS 16 — Shutdown / Securing17 steps
| 01 | Parking Position | CONFIRMED - Chocks IN | |
| 02 | Parking Brake | SET | |
| 03 | Autopilot | OFF | |
| 04 | Seat Belt / No Smoking Signs | OFF | |
| 05 | Fuel Boost Pumps (Both) | OFF | |
| 06 | Cowl Flaps (Both) | FULL OPEN (for cool-down) | |
| 07 | Engine Cool-DownNOTE: Allow both engines to cool at idle for at least 2 minutes before shutdown. Radial engines require a cool-down period to prevent oil carbonization in the cylinders and bearing damage. | IDLE 1,000-1,200 RPM - 2 MINUTES | |
| 08 | Vacuum Gauge CheckNOTE: Monitor vacuum during shutdown. Should read normally until magnetos are cut. | CHECK during shutdown run | |
| 09 | Magneto Cutout Check (10 RPM rise)CAUTION: If no RPM rise is observed when cutting mixture, the magnetos may still be live. Treat propeller as potentially HOT - do not touch. Notify maintenance.NOTE: When mixture is cut to idle cutoff, note a slight RPM rise just before engine stops. If no rise occurs, magneto grounding circuit may be failed - magnetos could be 'hot' even with switch off. | VERIFY 10 RPM RISE at mixture cutoff | |
| 10 | Mixtures (Both)NOTE: Cut mixtures to idle cutoff to stop both engines. This prevents fuel-fouled plugs and fire risk. | IDLE CUTOFF (to stop engines) | |
| 11 | Magneto Switches (Both) | OFF (after engines stop) | |
| 12 | Generator Switches (Both) | OFF | |
| 13 | Nav Lights | OFF (if day) / ON until ground power connected (if night) | |
| 14 | Battery Switch | OFF | |
| 15 | Firewall Fuel Shutoff Valves (Both)NOTE: Close firewall shutoffs to prevent fuel migration while parked. | CLOSED | |
| 16 | Control Locks / Gust LocksNOTE: Install gust locks to protect control surfaces and airframe from wind damage while parked. | INSTALL | |
| 17 | GSX - Passenger DeboardingNOTE: GSX menu: Deboard Passengers. | COMPLETE |